Last week, my friend Karen wandered into my kitchen mid-apple-crisp prep, lamenting about her doctor’s sugar warnings but refusing to give up dessert. “Watch this,” I told her, reaching for my Truvia stash.
Twenty minutes later, she was scraping the pan clean, demanding the recipe. The secret? Nobody—and I mean *nobody*—can tell this buttery, cinnamon-spiced masterpiece isn’t made with regular sugar. Sometimes the best culinary wins come from strategic substitutions that taste just as indulgent.
History & Origin
While apple pie dominated American dessert tables for centuries, apple crisp emerged in the 19th century as a resourceful alternative that didn’t require pie-making skills or precious flour and butter for pastry. I love how Depression-era and wartime cooks embraced this crustless dessert when rationing made traditional pies impractical. Early community cookbooks featured these humble recipes, and by mid-20th century, the oat-and-butter crumble topping became standard. Today’s versions shine with regional twists—nuts, brown sugar, cinnamon, nutmeg—and modern adaptations like Truvia let you enjoy this classic without guilt, making apple crisp the ultimate seasonal staple.
Recipe

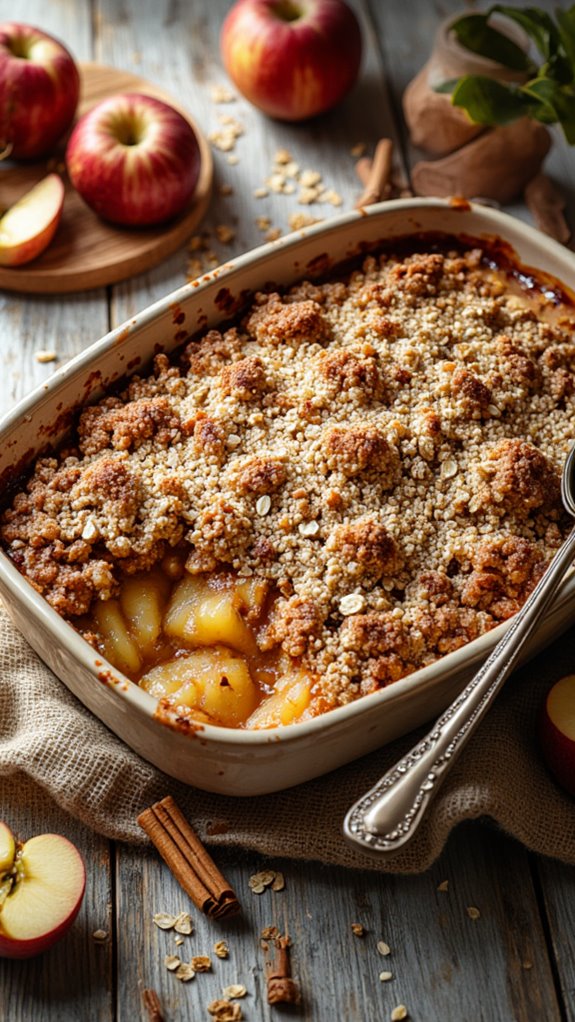
This lighter apple crisp delivers all the cozy comfort of a classic dessert while keeping calories and added sugar minimal. The Truvía sweetener blend allows the natural apple flavor to shine through without the heaviness of traditional recipes, making this an ideal choice for those watching their sugar intake or seeking a guilt-free indulgence. The combination of tender, spiced apples and a buttery oat crumble creates the perfect textural contrast—soft filling against a crispy, golden topping.
The beauty of this recipe lies in its simplicity and adaptability. Whether you’re preparing it for a weeknight dinner or a gathering with friends, the straightforward assembly and hands-off baking time make it accessible to cooks of all skill levels. With just about 35 to 45 minutes in the oven, you’ll have a warm, inviting dessert that pairs beautifully with a scoop of vanilla ice cream or a dollop of whipped cream. This recipe easily feeds 6 to 8 people and can be made ahead and reheated, making it a practical choice for busy home cooks.


Ingredients
- 4–5 cups sliced apples (about 4–5 medium apples)
- 2 Tbsp Truvía granulated sweetener
- 2 Tbsp all-purpose flour
- 2 Tbsp water or fresh lemon juice
- 1/2 tsp ground cinnamon
- 1/4 tsp ground nutmeg (optional)
- 1 cup old-fashioned rolled oats
- 1/2 cup Truvía granulated sweetener
- 1/3 cup all-purpose flour
- 1/4 to 1/2 cup melted butter
- 1/4 cup Truvía brown sugar blend
- 1/2 tsp ground cinnamon
- 1/4 tsp salt
Equipment
- 9-inch baking dish
- Cutting board and knife
- Large mixing bowl
- Medium mixing bowl
- Measuring cups and spoons
- Wooden spoon or silicone spatula
- Oven
Instructions
- Preheat oven to 350–375°F.
- Slice apples and place in a large mixing bowl; toss with 2 Tbsp Truvía, 2 Tbsp flour, water or lemon juice, cinnamon, and nutmeg until evenly coated.
- Transfer the apple mixture to a greased 9-inch baking dish and spread in an even layer.
- In a medium mixing bowl, combine oats, 1/2 cup Truvía granulated sweetener, 1/3 cup flour, melted butter, Truvía brown sugar blend, cinnamon, and salt; stir until the mixture resembles coarse crumbs.
- Sprinkle the crumb topping evenly over the apples, pressing gently so it holds together but remains crumbly.
- Bake at 350–375°F for 35–45 minutes (up to 60 minutes depending on apple thickness and oven variation) until the topping is golden brown and the apples are tender when pierced with a fork.
- Remove from oven and let cool for 5–10 minutes before serving.
- Serve warm or at room temperature, optionally topped with light vanilla ice cream or whipped cream.
Nutrition
Calories: 180 kcal | Carbohydrates: 24 g | Protein: 3 g | Fat: 9 g | Saturated Fat: 5 g | Polyunsaturated Fat: 1 g | Monounsaturated Fat: 2.5 g | Cholesterol: 20 mg | Sodium: 95 mg | Potassium: 150 mg | Vitamin A: 250 IU | Vitamin C: 4 mg | Calcium: 35 mg | Iron: 1.2 mg
Cooking Tips
To prevent a soggy bottom crust, ensure your baking dish is properly greased and consider placing a baking sheet on the rack below to catch any drips. If your apples release excess liquid during baking, you can drain some off halfway through cooking. For the most consistent results, use a mix of tart and slightly sweet apple varieties—such as Granny Smith combined with Honeycrisp or Gala—to balance the sweetness of the topping.
The crisp can be assembled up to 24 hours ahead and stored covered in the refrigerator; simply add 5–10 minutes to the baking time if baking from cold. Leftovers keep well for 3–4 days in an airtight container and can be gently reheated in a 300°F oven for about 10 minutes to restore the crispness of the topping.
Serving Suggestions
Serve this lighter apple crisp warm directly from a 350–375°F oven after 35–60 minutes of baking, paired with a scoop of light vanilla ice cream or frozen vanilla yogurt to create an appealing contrast between the crispy topping and tender apples. For a lower-calorie option, add a dollop of nonfat Greek yogurt instead, which boosts protein content without excess sugar—keeping each 1/8 dish serving (approximately 180–272 kcal) satisfyingly light. Elevate the presentation by garnishing individual portions with a light sprinkle of extra cinnamon or a few chopped toasted pecans or walnuts for added crunch and visual appeal.
The crisp’s versatility means you can serve it hot and bubbly, at room temperature, or chilled from the refrigerator—it keeps up to 3 days refrigerated or one month frozen. When using Truvia or monkfruit sweeteners, drizzle warmed sugar-free caramel sauce over each portion to maintain the reduced sugar profile while boosting flavor complexity.
Common Mistakes & Troubleshooting
The most common mistake when making apple crisp is overbaking the topping, which causes it to become hard and dense rather than maintaining its desirable crumbly texture. When preparing this recipe, ensure you monitor the crisp during the final 10–15 minutes of baking; the topping should be golden brown but still slightly soft when removed from the oven—it will continue to crisp as it cools. Another frequent error involves pressing the crumb topping too firmly before baking; this compacts the mixture and prevents proper browning and texture development.
Additionally, using apples that are too thick-sliced can result in undercooked filling even when the topping browns perfectly, so aim for consistent 1/4-inch slices. I once forgot to account for my oven running 25 degrees hot, which caused my crisp topping to burn while the apples remained slightly underdone; using an oven thermometer now prevents this issue entirely.
In Conclusion
This apple crisp with Truvia proves you don’t need to sacrifice flavor for a lighter dessert. The tender apples, perfectly spiced filling, and buttery oat topping create that classic comfort we all love. It’s my favorite way to enjoy dessert without derailing my wellness goals.
The best part? This recipe is incredibly forgiving and comes together in under an hour. Whether you’re serving guests or treating yourself on a quiet evening, it delivers every single time.
If you loved this lighter take on apple crisp, you’ll want to try my Classic Apple Crisp With Oat Topping for another delicious twist on this classic dessert!